When you make a raggy quilt it will probably be the easiest quilt you will ever make! Especially good for beginners, and for experienced quilters it’s fantastic if you need to make a quilt in a hurry for a gift. It’s quite easy to make one in a weekend.
 It’s easy to cut with a rotary cutter and the seams are very forgiving – you don’t have to be the perfect seamstress. And the best part is you have no quilting to do at the end.
Admittedly, snipping the edges to fray can be a little tedious, but if you settle in with a hot chocolate and a good movie you’ll find it’s done in no time.
And the finished product is so gorgeous and cuddly you will love it!
There are several different ways to make a raggy quilt – all look similar in the end. You can use any fabric that will fray out well including cottons, flannels, twills, homespuns, chenilles and denims.
The weight of the front fabric will determine what you put on the back, and on the inside. If you are using a thin cotton fabric on the front and back, you will probably want to put batting in between the layers. If you are using flannel front and back you can choose either to put batting between the layers or simply an extra layer of flannel. If you are using denim, as in recycled jeans, you may find a single layer of flannel to back it is sufficient with no filling.
 On others I have seen a windcheater fleece fabric used to back a flannel raggy quilt. No batting is then required, but you should realize that windcheater fleece can stretch a little when it is sewn.
It will not fray out like cotton fabrics so your raggy quilt will have a ‘tufty’ look rather than a ‘fluffy’ look on the edges.
However, the combination of flannel and polar fleece is exceptionally cuddly and warm.
If your raggy quilt is to have only a front and a back, cut both lots of squares the same size. Pin your blocks together, i.e. a front on top of a back, with wrong sides together. Lay out your blocks in a pleasing design. Pin with the back sides are together, and then stitch the squares together into rows using a half inch seam. Stitch the rows together the same way (making sure the back sides are together), and aligning all the seams. Then sew a half inch seam around the edge of the quilt.
If you are using three layers of flannel, also cut the three layers the same size and make up the same way. This technique produces a fluffier seam as in each seam you have six layers of fabric instead of four.
If you are using two layers with batting in the center, cut the batting squares one inch smaller i.e. if your front and back pieces are 9” square, cut the batting 8” square.
Put a backing square right side down on the table, center a batting piece over it, then put a front piece over it right side up and aligning it with the edges of the backing. Pin them together, then stitch diagonally across the square from corner to corner. Repeat, stitching across the other diagonal. This is to hold the batting in place as it won’t necessarily be caught in the sewing up seams.
Repeat this for as many squares as you require. Lay out your blocks in a pleasing design. Pin with the back sides together, and then stitch the squares together into rows using a half inch seam. Stitch the rows together the same way (making sure the back sides are together), and aligning all the seams. Then sew a half inch seam around the edge of the quilt.
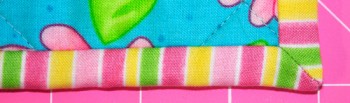
Snip the edges carefully with sharp embroidery scissors at ¼” intervals without cutting the stitching. Do the same between all the squares.
Wash the quilt on a long wash and tumble dry it to get that raggy effect. It may work better if you add a tennis ball to the clothes dryer to get more agitation.
Tip: This process will shed quite a lot of fluff and
if you do not have satisfactory lint collectors in
your machines you might like to make a trip to
your local Laundromat to wash and dry your raggy quilt.
So put your imagination into gear and make a raggy quilt! They are great fun to make and you will love how cuddly they are to snuggle up in.